The Ukulele School
A Quick Note On Chord Diagrams
What is the best way to draw a chord?
When learning a new chord on the Ukulele, it can often be helpful to see a picture showing you where to put your fingers. These pictures are known as chord diagrams.
Here at The Ukulele School we choose to draw our chord diagrams a little differently from the standard approach.
Recently I was teaching some students how to look up and learn some more advanced chords for themselves, using a simple google search. There was some obvious confusion as they discovered that the images of chords they were finding didn’t match those they had been using previously.
Whilst we don’t want to cause unnecessary confusion I am going to try and explain our approach to diagrams and the reasons why we draw them this way.

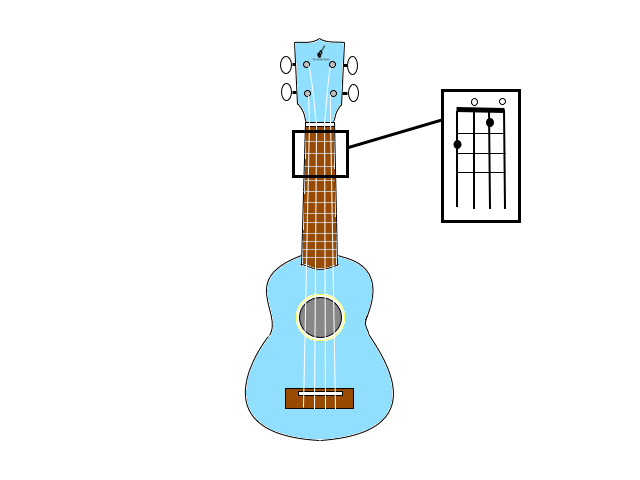
Here we have an F Major chord written in the standard way (as you might find with a simple google search). The thick black bar at the top represents the nut of the ukulele (the raised area that separates the head from the neck). The strings are shown going downwards with G on the left working across to A on the right.
The two dots show where to place your fingers. The small Os above the diagram mean that those two strings are left open.
Whilst this isn’t too difficult to understand for most pupils, it doesn’t help that the ukulele is orientated in a way that we would never actually play it.
When we take into account pupils who may be struggling to hold a ukulele the right way round, or have difficulty telling left from right, we have found that drawing the ukulele this way can be really quite disorientating.
For this reason we have chosen to draw our diagrams side on, so that the ukulele is held in the same position that you would normally hold it to play. We also add some additional details such as parts of the head of the ukulele in order to further show which way we are holding it.
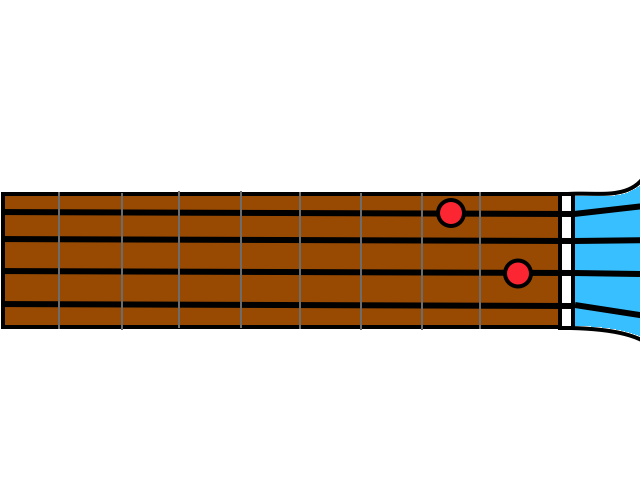
There are still some issues with showing chords like this and here at The Ukulele School we have had lengthy (and honestly quite dull and geeky) discussions around whether we should use a face-on perspective or a mirror perspective. Eventually we settled on showing the neck as if you are looking at a teachers ukulele being played, rather than a mirror image of the pupil’s ukulele. Inevitably we have found that some of our pupils would rather a mirror image and some would even prefer the more traditional upright diagrams. When learning an instrument no one method will work for everyone, but this is the system we have found works for the largest number of pupils.
In your lessons you could try experimenting with using different diagrams and you may find that you disagree with our method. As always we would much rather you used what works best for you and your class.
–
Do you disagree with us or have an even better way of drawing chords for your pupils to learn, please let us know and join in the discussion on the forums, or on Facebook, we are always open to hearing new ideas.